So I am off and running. Made the head in cloth and hated it so did a clay/cloth over. His nose is still large - need to work on normal size noses for men. Chipped away at it a bit but still too long. Had to redefine his brow twice before I was happy. His mouth is crooked and bottom lip too big, but he sort of does look like one of the brothers.
 .
.

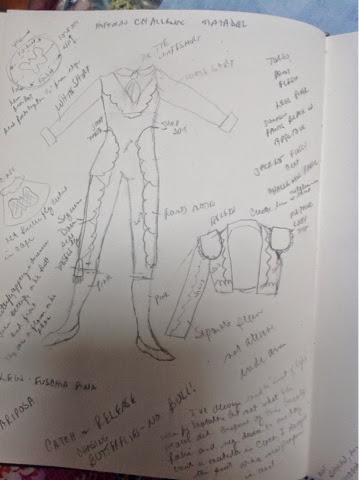
Next is the body. I created the body and armature based on the size of the cloth head. The head grows with the addition of the clay and now the body is too small. So now a new armature, body and legs. Created the legs with the hip and buttocks as part so when I attach them, he has a nice shaped behind if I do say so myself! I placed the pieces so there would be an interesting design down his legs. Did fussy cut the mandala on his chest. Beaded it like crazy. Started to bead down the side of the legs but the trim looked better. Stepped back and the legs looked WAY too long, and also when I added the head, over the height limit by 1", so I pushed up his pants and hacked away 1" from his thigh. The jacket was coming along though I am running out of that mandala and had to use a different one for the sleeves - and this from a yard of fabric! And to add insult to injury, I ran out of two colors of beads. Since I got them at my local bead store, off I went to get more only they didn't have them in stock. Checked on line and couldn't find the color numbers. I did have Chech beads in the same or similar colors to mixed them in. At least the fronts and jumpsuit are all the same beads.

At this point I am thinking "what was I thinking!" I am diametrically opposed to the purpose for the outfit, I think his legs are too thin, and not a great stuffing job on the lower legs! But I continue on. Once I got his hands on, I punched the armature through the one on his hip and had to redo. Decided to just cut the wire off rather than try to bend it to my will. I use a heavy 16g double hard stainless steel for the armature, It is very stiff and strong and since I started using it, none of my dolls have come back misshapen.
I must admit I was getting very discouraged and thought that maybe I should cut my loses so I made a head for the little girl I am calling "A Style of Her Own" inspired by my good friend Colleen Athens. I wanted the head to have a small pointed chin and rounded face. First draft was not right so I did a clay/cloth over. Second version chin a little too sharp, third one OK but not enough chin. I like all three though but will do one more just to get the look I want. May eventually create a pattern.

The matador is 95% finished. Not really happy with his shoes and will remove him from the base for the second time to fix them. Once I got his head, hair hat on, he was about 1/4" over the limit so I had to take more off his legs but I did take the time to restuff his lower legs and redo the trim around the leg bottoms. I also fitted them better after I shortened them. BIG improvement. Finished pics in the next post. So far, I have about 3 weeks invested in this project. I also have been working on my Mr Cat pattern for a break from all this lack of progress. I think he is more Matador meets Alexander McQueen!

 She is done for now - may give her a purse and maybe a little doll to hold. Not sure if I am going to send her in. Not totally happy with her shoes. I wanted to put saddle shoes on her and I didn't have heavy enough white leather plus if I layered black over it for the sadle part, it would have been too heavy. So, I looked around and used some pre-sized and primed white canvas. Gave it another coat of Gesso then painted on the black. I should have turned the top edge under but didn't and they gap a little in the back.The base is covered with another coordinate. She went together because I must admit, I used some reject parts on her. The armature was from the Matador that was too small as were the legs so she has really skinny feet - had to put some stuffing in the shoes to fill the toes out! Not sure what I am going to do with her yet. Maybe a pattern down the road. Would like to do a leaner version without the armature too.